If you love creating art and teaching others, offering online art lessons and programs is a great way to combine your passions (and earn some income, too).
But getting started can feel overwhelming.
Should you sign up for an established platform or go out on your own? How will students find your schedule and book classes? Should you create a course? And how do you even handle payments?
Luckily, you don’t need to figure it all out alone. In this guide, we’ll walk through:
- Why teaching art online can feel complicated (and how to keep it simple)
- What you really need to start your own online art business
- How to grow your audience and make consistent sales, even if you’re starting from scratch
By the end, you’ll have a clear path to share your artistic passions with the world, and I bet it will be easier than you think.
Teaching art online doesn’t need to be complicated
When you take the leap into teaching art online, you’ll probably have a lot of questions.
- What kind of equipment do I need?
- Should I teach live or pre-recorded classes?
- Where should I set everything up online?
- How will I make money?
Those are all valid questions, and the search for answers can get overwhelming fast.
Start researching platforms and you’ll end up buried in tech jargon, endless features, and tools that don’t play nicely together. Then there’s the pressure of finding students, getting them to sign up for your paid programs, and keeping them around for the long haul.
And even once you’ve picked your tools, the setup process can feel like a puzzle with a hundred missing pieces. No wonder so many people get stuck before ever launching.
But the good news is that pulling everything together doesn’t have to be intimidating. In fact, you can probably get the foundation of your online art teaching business set up in a single weekend.
Because you don’t actually need a complicated tech stack or expensive gear. You just need your art supplies, a simple website, a digital product or two, and an email list to connect with your students.
The 4 things you really need to teach art online: art supplies, a website, digital products, and email marketing
Okay, it’s one thing to say that starting your online art business is simple, it’s another thing to actually do it. So let’s walk through everything you’ll need step by step.
#1 Gather your art supplies and filming setup
First is the most obvious, and probably something you already have on hand if you’re an artist yourself. Art is visual, so you’ll need the supplies and tools required to make art in your medium. You can’t teach painting classes without paint!
Spend some time assembling the pencils, canvases, sketchpads, yarn, thread, or digital tools you’ll need to make your work.
(Pro tip: While you do this, make a note of everything you use to provide a quick and easy checklist for your students!)
You’ll also need a way to show your students what you’re doing as you create your art. Simple is best here. If you’re drawing, painting, or making something with your hands, you can use a gooseneck phone stand or tripod, attach your phone, and point your phone camera at your work surface. Position your work under the phone camera and voila, you’re ready to film!
Don’t get too hung up on having tons of camera angles when you’re new. Also, you can always add a voiceover later if it feels too tricky to narrate and film at the same time.
If you’re offering live classes, you can use the same setup with your phone camera pointed down at your workspace. Join your Zoom, Meet, or Hangouts call from your computer with your webcam on so your face is visible in the class. Then join the call a second time from your phone — the one you’re using to film. Share your screen in the call from your phone so your students can see your workspace and your face throughout their live session.
If you have a specific art teaching setup in mind, there are tons of great YouTube videos that show you how to create your virtual studio, but remember that simple is often best. Getting started is more important than getting it perfect.
#2 Set up 1–2 online products
Next, you’ll decide what online products you want to offer. Many art teachers do 1:1 classes or live group sessions, but we’ve also seen art teachers offer courses, community memberships, and digital products like templates and patterns.
For example, Amy and Ella Bartley from Creative Cat Art Studio teach art classes for children. They offer live classes and self-paced lessons, and their students get access to video tutorials as well as printable worksheets and resources with each project. They also have a gallery area on their website to showcase student artwork.

Sketch instructor and industrial designer Martijn van de Wiel teaches design sketching. He offers beginner and advanced self-paced courses, as well as custom workshops for teams. He also shares blog posts and sketching hacks on his website so prospective students can see his teaching style and learn more about what he offers.

And Lisa Bardot runs the Art Makers Club, a community membership for digital artists learning Procreate. Members can watch tutorials and meet other artists, and there are live events, feedback sessions, and hangouts each month. The membership also includes courses and tutorials, as well as exclusive Procreate brush sets.

Podia makes it easy to set up digital downloads, courses, webinars, community memberships, and 1:1 coaching sessions or lessons so you can configure your business however you like.
If you’re brand new, I recommend starting with just one or two offers. You can use Podia to offer individual art lessons using the coaching product type, or you can create a digital download video tutorial showing students how to do something, for instance.
As you grow, you can make evergreen courses that can be sold an infinite number of times, cohort programs with live teaching elements, or even a membership area with regular new content for that delicious recurring revenue.
No matter what you make, Podia makes it easy to process payments, charge one-time fees, offer payment plans, or set up subscriptions for your products. You can also add seat limits and time limits to your products, add upsells, create coupons, and combine your products to create enticing bundles.
You can learn more about how to make different types of products in Podia in these guides:
- Creating an online course for your art business
- Creating a digital download
- Offering 1:1 sessions and coaching
- Running live and pre-recorded webinars
- Setting up your community membership
#3 Make a simple website
The next thing you’ll need to get your work out there is a website. And yes, I mean a real website, not just an Instagram profile or YouTube channel.
Even if you have the greatest social media presence around, you’ll still need a place where you can connect with people and tell them about your products — away from the algorithms and competition on social.
With Podia’s website builder, you can create as many pages as you like and build sales pages, landing pages, and even a blog. Everything is automatically connected to your products and email list (more on that in a minute), so you don’t have to worry about audience members getting lost in the shuffle.
You can also customize your layouts, colors, fonts, and page designs to make your website feel like you. (Hellooo gallery sections to show off your artwork!)
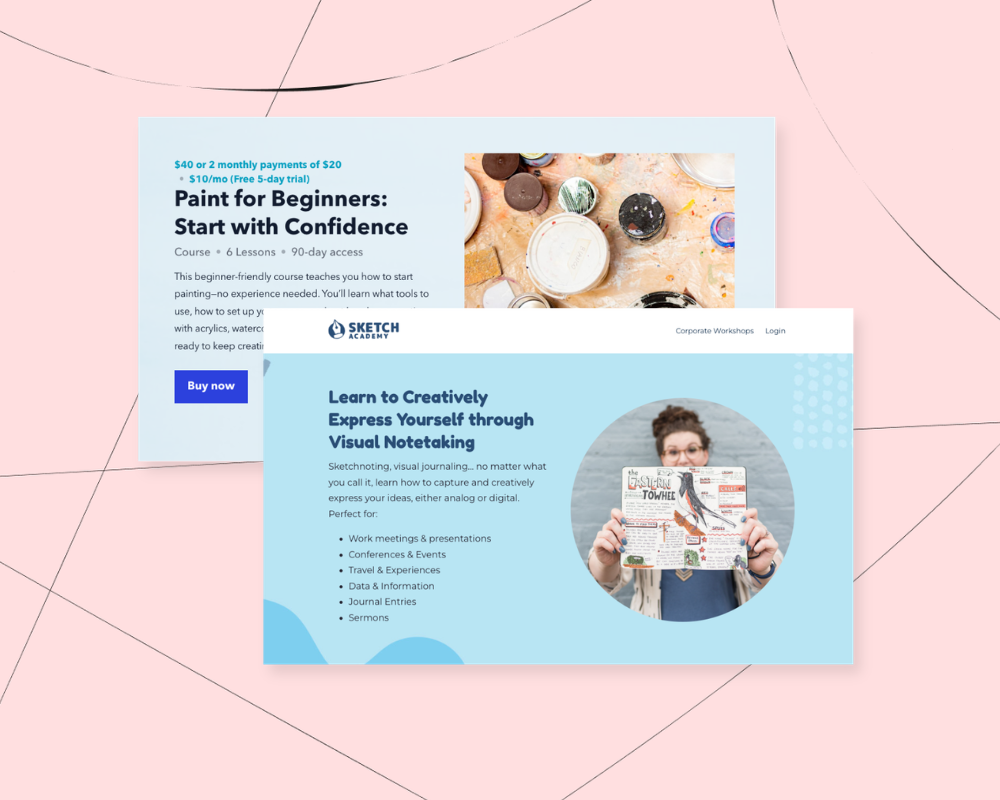
For example, Emily Mills from Sketch Academy uses a bright color palette and fun background designs for her art business. Her home page has information about Sketchnoting, freebies and paid products, an “about” section, and customer testimonials to build credibility.

The nice thing about having a website you control is that you can update it whenever you want as your business grows. And when that website is already connected to all your products, managing everything is even easier.
Whenever you add a new product in Podia, we’ll automatically generate a sales page for you so you have a place to send your customers. You can use this page as is or customize it however you like, and all sales pages have an easy “buy now” button and checkout page so your customers can buy from you.
Podia also has blogging built in, so you can reach more people and build your audience with helpful content. A blog gives you more opportunities to appear in search engine results and lets you help your readers by sharing art tips and tutorials for free, right on your site.
Artist Lynsay Green does this on her website alongside her painting courses and programs. Her blog has great advice for painters around topics like color theory, creating a great studio space, and how to get out of a creativity rut.

I recommend starting with a simple homepage that includes information about you and links to your courses and programs.
Then, customize the sales page for each product you offer with extra information, testimonials, or FAQs.
And finally, set up your blog with 2–3 articles that will help your target audience.
You’ll add to this over time, but these core elements are perfect for getting you up and running fast.
You should also include email sign-up forms throughout your website so people can join your email list, which takes us to #4.
#4 Start your email list so you can grow with email marketing
You need your website and digital products to find customers and make sales, but your email list is how you’ll build trust and stay in touch with them long into the future.
Think of it like this: we get a zillion emails in our inboxes every day. If someone is choosing to hear from you, that means they care about what you have to say and are likely a good fit for your business.
When you send regular newsletters, you can share tips and advice to solidify your position as an expert and valuable resource. That way, when you run a sale or promotion in the future, you’ll already have a list of people who know, like, and trust your work.
Here are a few tangible ways to get your email marketing up and running in your online art business:
- Add an email sign-up form to the homepage or footer of your website. If you have a blog, add an email form to the bottom of each blog post. (Here’s how to do this in Podia.)
- Set up a free lead magnet using a digital download product. In the pricing tab, set the price to free email delivery. This will let someone download your free product in exchange for joining your email list.
- Set up your welcome email sequence to fire whenever someone joins that list. In your welcome emails, you can tell people about your business and art products. You can build this using Podia's campaign feature.
- Send out a regular newsletter and share helpful art tips, information about your products and programs, and other content that’s interesting to your fans.
By doing these steps, you’ll build a consistent email presence and a system that automatically brings new subscribers into your list. Those new subscribers will be welcomed and introduced to your paid art products too, so you never miss out on a potential sale, even while you’re working on other parts of your business.
And all of this grows with time.
The more blog posts and content you create, the more people will know about your brand and visit your website. That means more people will see your email sign-up forms and lead magnets, resulting in more subscribers.
As you launch new things in the future, you’ll already have everything built in to keep in touch with customers and prospects under one roof. Add promotional emails for new products into your welcome series, share what you’re working on in your newsletter, or even ask your subscribers what products they want to see next.
When you’ve got a direct line of communication with your biggest supporters, there’s no limit on how much you can grow.
Build an art business you love all in one place
Teaching art online doesn’t have to be complicated — in fact, all you need is your art supplies, a smartphone to film, and an all-in-one platform like Podia to manage the technical stuff.
Here’s a quick overview of how to start teaching art online
- Gather your art supplies and set up a simple filming area
- Create 1–2 online products, like 1:1 sessions, courses, or tutorials for your students
- Make a website with a home page, product sales pages, and a blog
- Start your email list to stay in touch with customers, send newsletters, and grow your business on autopilot
You can build all that and much more with Podia, so start your 30-day free trial today. I can’t wait to see where your art takes you.


