For years now, you’ve heard about the glorious passive income that startup entrepreneurs bring in from successful online courses.
And the booming online course trend is only heading upwards.
With an anticipated CAGR of 3% and a market value of $6.71 billion by 2024, we expect the self-paced elearning global market to flourish alongside its course creators.
Ready to hop on the online learning wave, but just don’t know how?
You’re in the right place.
If you want to add your first online course to grow your online business, we share a step-by-step tutorial for creating your own online course.
Today, we’ll teach you how to validate your course idea, organize course content, course creation tips, and effective ways to land course sales.
We’ve got some ground to cover, so let’s dig in.
7 steps for creating your first online course
#1. Validate your course topic
Even if you’re brand new to this online course creation thing, if you’re growing an online business and have a target audience, then you already have a great foundation for our first step — validating your course idea.
The most important part of your online business (and any business for that matter) is your target audience.
So, naturally, it makes sense to ask them first about your course ideas.
No one will know the pain points better than your audience members and customers, so it’s definitely worth prioritizing your customer research over any other data source.
Have an email list? Golden.
Just send a survey link to your subscribers asking them about their pain points and what they need help with.
Favorite survey tools among marketers — SurveyMonkey, Typeform, or Google Forms — will do the trick.

Another option is to reach out on social media for insights.
My favorite shining example of this is online course creator John D. Saunders, who asks his Twitter audience for feedback and course validation before publishing or selling his online courses.
Check out his Tweet thread, where John shares how he involves his audience in the course creation process.
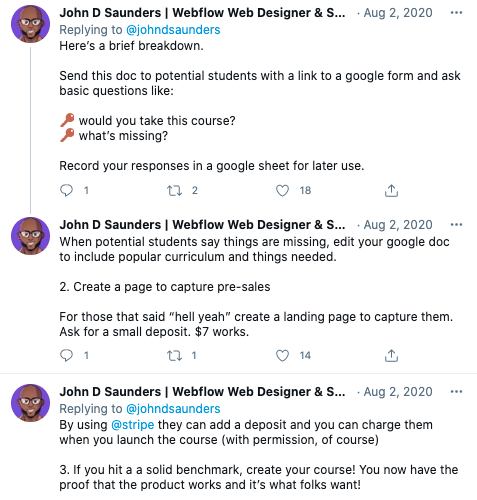
This process of validating your course topic among your audience first works like a charm.
So much so that it brought in $10,000 in course sales on John’s launch day.
Pretty impressive, right?
To get to this high-earning launch day, validating your online course idea is a massive foundational step.
The next is outlining.
#2. Outline your course content with beta customers
Contrary to what you might think, you don’t necessarily need to be a top educator, or even acquire new skills, to create an online course.
And there’s no online course training that you need to complete before starting your own online course.
As long as you focus on delivering a specific result to your target audience — especially one that’s been validated as a course idea they want and need — creating a profitable course naturally falls into place.
Especially if you ask audience members to become beta customers.
You might be thinking — woah, I don’t even have a course outline yet, and you’re suggesting I enroll beta users?
Yes, involve your target audience in as much of your course creation process as possible.
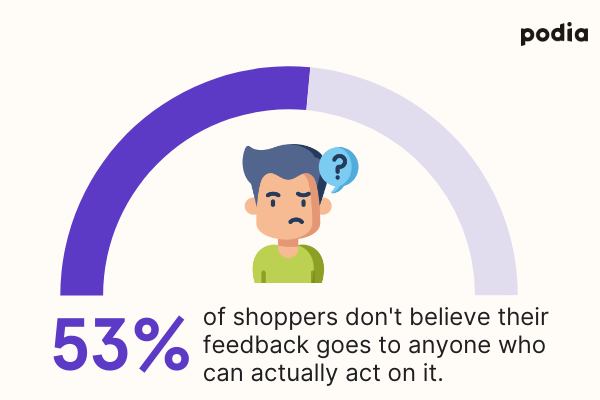
Sadly, 53% of shoppers don’t think their feedback goes to anyone who actually acts on it, so your beta students who see their feedback integrated into your products will be thrilled.
Here’s another affirmative — invite beta users before you begin creating your online course content (including any worksheets, PowerPoint slides, course pages, video content, et cetera).
The beautiful thing about enrolling beta customers is three-pronged:
-
You get to test in real-life your online course content and curriculum
-
You have the chance to iterate and improve based on beta users’ feedback
-
You can ask for testimonials and feature them on your course sales page
A solid group of people to invite as beta students is those who responded to your questions while validating your course idea.
They’ve already shown interest in your course topic and provided insights into what they want help with. This makes them a great fit as beta testers.
Rather than offer free courses to them (although that is an option), consider giving them a big discount on your official course the day it launches.
In other words, pre-sell your online course to your beta students. When you take into consideration that your beta students are directly informing your course contents, the finished product should be exactly like what they’re looking for.
This, too, is John D. Saunders’s process for pre-selling his profitable courses, like his Learn to Create Standard Operating Procedures online course that pulled in over $100,000 using Podia.
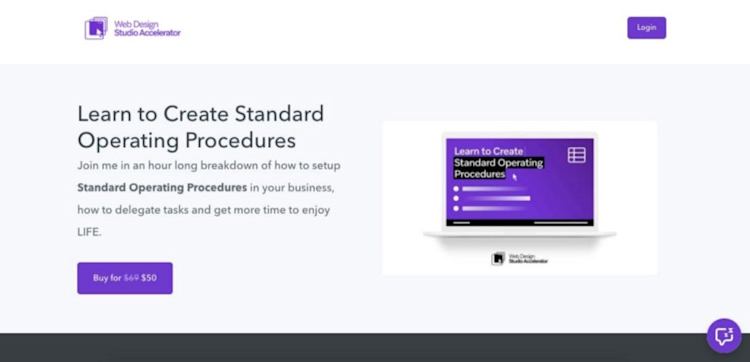
Makes beta-launching seem attractive, doesn’t it?
In sum:
Enlist beta users to help you build your course. Use their opinions and feedback to help shape your course contents to accurately suit their needs.
Once your beta students inform your course content, it’s time for the fun part of putting it all together.
#3. Create your course content using relevant formats and tools
While this step may seem like the most daunting one at first glance, in reality, course creation can be a cinch if you break it down into course formats first and then match it to your outlined lessons.
Three simple ways to categorize course media formats are:
-
Audio
-
Video
-
Text or PDF
Simply match the best media format to your course content topic.
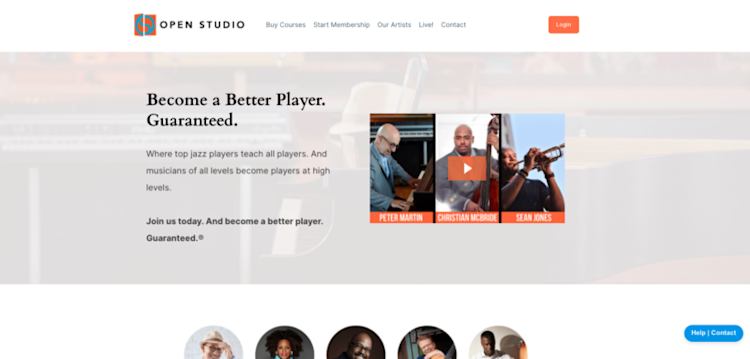
Open Studio’s jazz musical online courses, for example, include audio and video lessons.
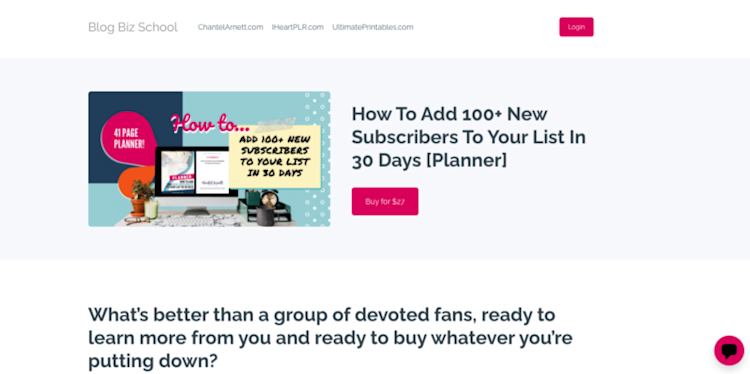
Students taking courses featuring the written format will benefit from lessons that rely more on text or PDFs, like Blog Biz School’s How To Add 100+ New Subscribers To Your List In 30 Days.
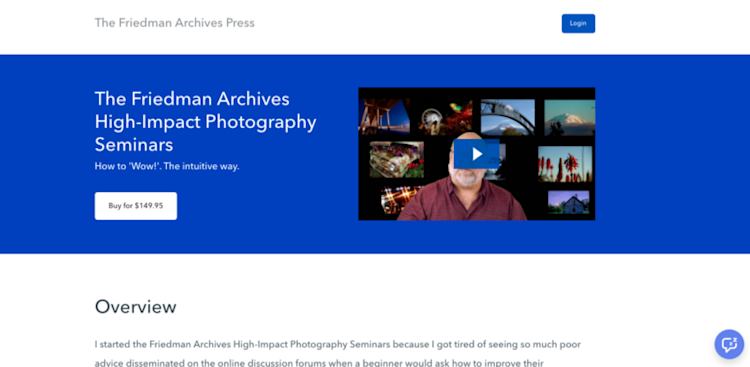
Or like The Friedman Archives High-Impact Photography Seminars, which feature visual content in the form of PDFs with text and images, as well as video lessons.
No matter the topic, it’ll lend itself to a suitable media format.
If you’re on the fence about media formats, we highly recommend incorporating video. While it takes the most amount of effort to record and edit video content, it’s only becoming increasingly popular and effective.
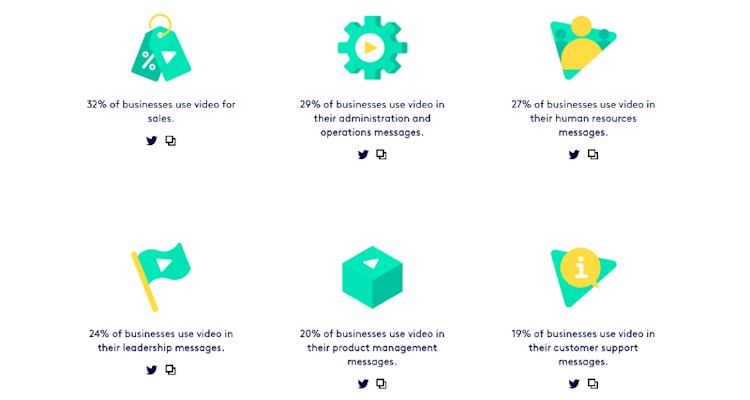
In fact, it’s not just marketers who prioritize using video. These days, multiple departments across the board are leaning on video as an effective media format.
You’ll need a few essential tools to create, record, and sell your online course once you’ve settled on your media formats.
Here’s a helpful breakdown of relevant tools for each format:
-
Audio — A decent mic and set of headphones
-
Video— Screen recording tools like Camtasia or Loom, a pro camera or your iPhone camera, editing software, a tripod, and good lighting
-
Text or PDF— Google Docs for text, and design tools like Canva or Venngage for PDFs

If you come across other tools, try to fit them into one of these categories to keep your course creation streamlined.
All in all, there’s no need to get overwhelmed by all the course creation choices if you stay focused on just a few formats and tools.
There’s one more tool choice you need to make, and it’s an equally important one — your course platform.
#4. Choose an online course platform and upload your course content
Your next step is to choose an online course platform for housing your online course.
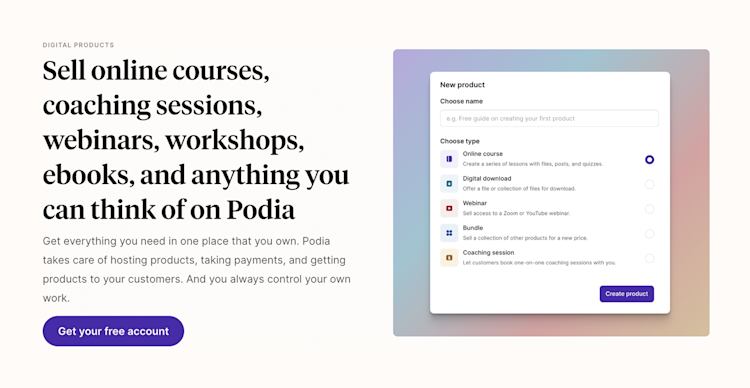
With all-in-one platforms like Podia, you create, sell, and market from one dashboard. Podia also gives you code-free access to course creation features like graded quizzes, course compliance, and drip content.
Tools like WizIQ, on the other hand, allow you to integrate a learning management system (LMS) into your own website using an API and/or plugin for WordPress or Joomla, for example.
Alternatively, tools like Ruzuku offer an LMS platform that lets you build an interactive online course and engaged student community, which you may want to consider if a live element is a big part of your online course.
As you can see, you have your pick of course platforms to choose from. The right platform for you will empower you to create a top-tier student experience while easily managing your business on the back-end.
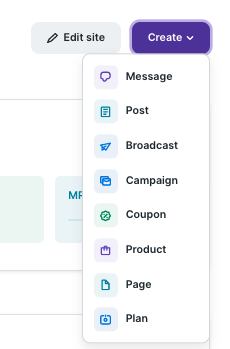
Check out how seamless the process is for creating an online course with Podia. You simply log into your dashboard, click the “Create” dropdown menu at the top, and select “Product”.
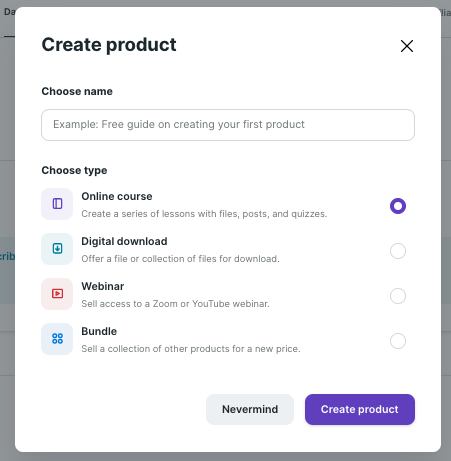
From there, a modal pops up. Just enter your course name and select “Online course”.
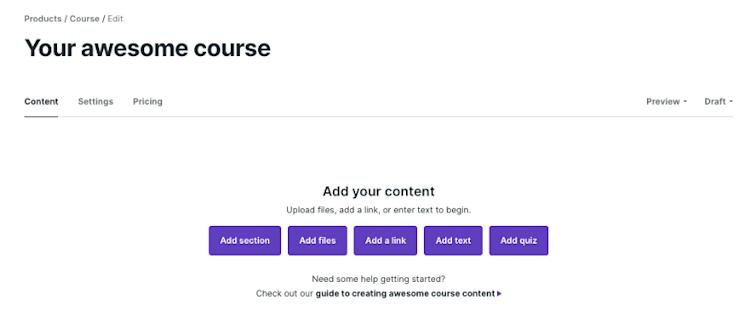
Then, add your course content. Any format goes, from links and text to videos and quizzes.
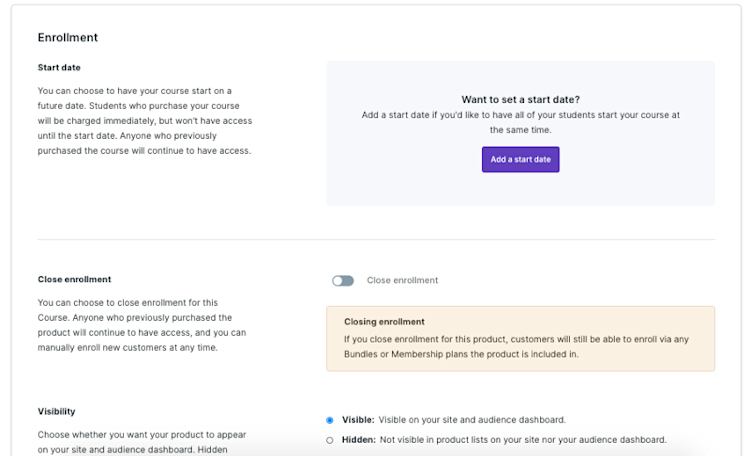
Under the “Settings” tab, you’ll see a place to start and close your enrollment dates.
You can also choose whether or not you want your product to appear “Visible” or “Hidden” on your site. This is also where you can add third-party apps and integrations.
Finally, add your pricing on the “Pricing” tab (and include a payment plan if you want). You can even add product upsells from this same tab.
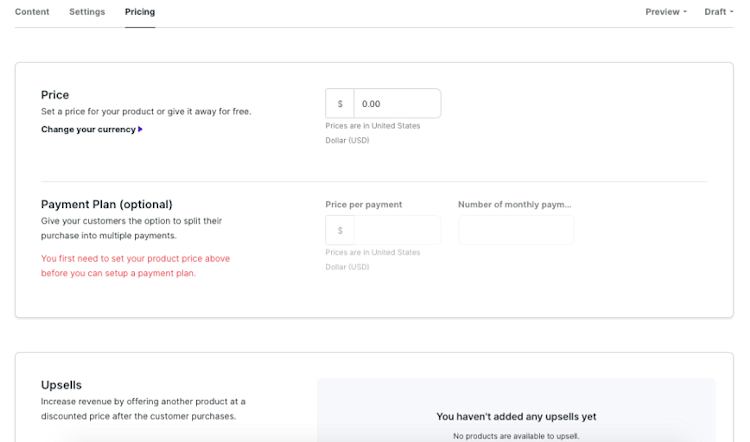
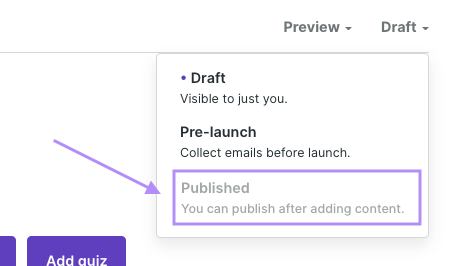
Once these details are filled in and uploaded, select “Published” from the “Draft” dropdown in the upper-right, and — voila — your online course is good to go.
See for yourself -- Get your free 30-day trial from Podia today.
Regardless of the platform, we suggest you sell online courses from your own website instead of a marketplace (like Udemy or Gumroad) — for several reasons, the big ones being:
-
You keep your profits (no profit sharing or extraneous fees)
-
You have full control and ownership over your relationships with customers and contacts
-
You can brand your own website to be consistent with your online business
Once you upload your course content to your online course platform of choice, the next steps involve getting ready for market — starting with your pricing.
#5. Decide on your pricing
While there’s no single template to follow for pricing your online course, we recommend a few pricing strategies.
The first being value-based pricing, where you charge a course fee that’s above both your cost and markup. As long as your online course delivers a high perceived value, this is a great strategy to use.
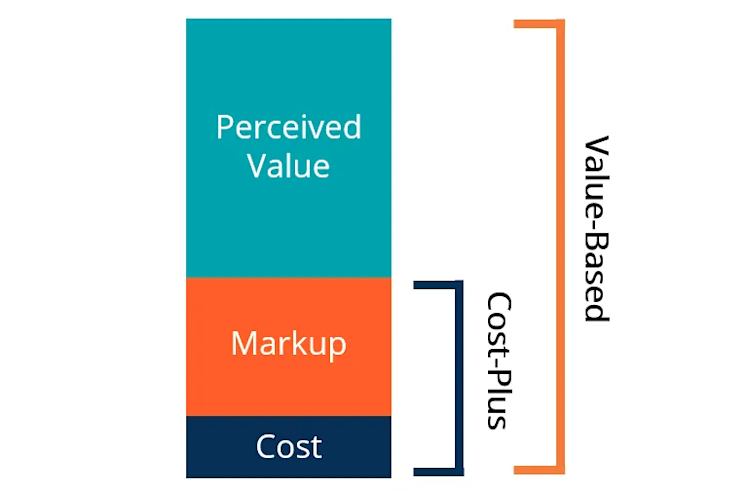
Another strategy is cost-based pricing, where you mark up your online course fee based on your cost and profit margin goal.
Alternatively, you can use price transparency to price your online course, which is when you make your costs and profits known to your customers.
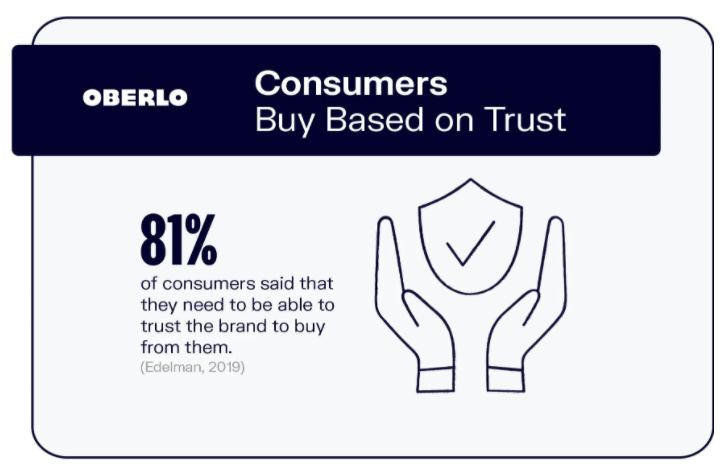
The perk to using price transparency is that it builds trust among your audience. Given that a significant 81% of consumers need to trust the brands they purchase from, price transparency isn’t a bad way to go.
Course prices vary widely across the board, regardless of the pricing strategy.
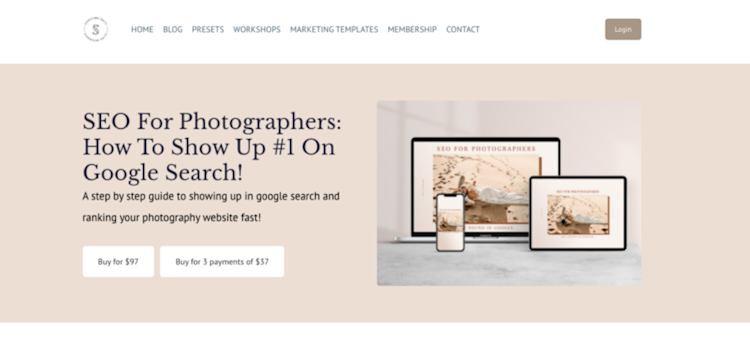
Take, for instance, Signature Edits’ SEO for Photographers course, which goes for one payment of $97 or three payments of $37.
On the higher end, Nick’s Real Estate Masterclass goes for a one-time payment of $2,500 or three payments of $870.
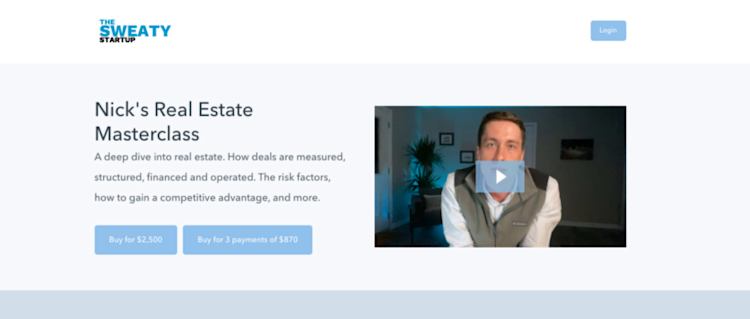
The main takeaway here is to use a price point that matches your customers’ perceived value. This depends greatly on your unique online course, audience niche, and business.
Once you’ve settled on a course price, you’re ready to publish it alongside your course benefits on a sales page.
#6. Create a sales page
There are many ways to create a high-converting sales page. We’ll cover a few key components that will help lift your conversion rates.
One very key ingredient to include on your course opt-in landing page is social proof. This includes testimonials, reviews, and case studies.
Basically, if people see that other people have enrolled in your online course and gotten results, they’ll be much more likely to believe in your product and buy.
Even if you have a high-ticket online course, testimonials will help your conversions. In fact, customer testimonials placed next to more expensive items can increase conversion rates by 380%.
Another sales-page-must is to clearly outline your benefits. This can be tricky, especially when you consider the fact that it’s the biggest challenge to growing memberships.
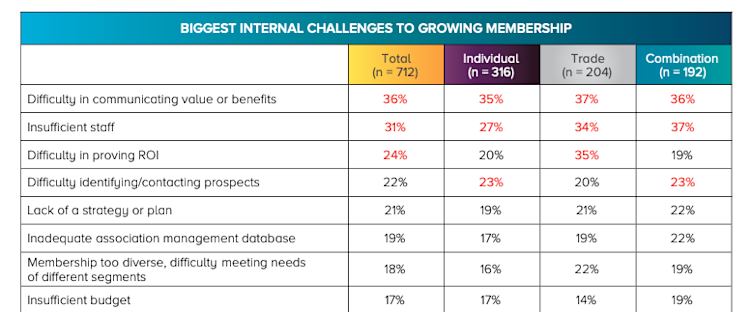
Sure, you’re not necessarily growing a membership program, but it’s the same concept for growing your student base. There needs to be a compelling reason (or reasons) for enrolling in your course.
To clearly communicate your online course benefits, try using both explicit language and a clean design.
Daniele Catalanotto’s 100 Service Design Principles sales page does this well, where he lays out brief explanations for each benefit in bullet form.
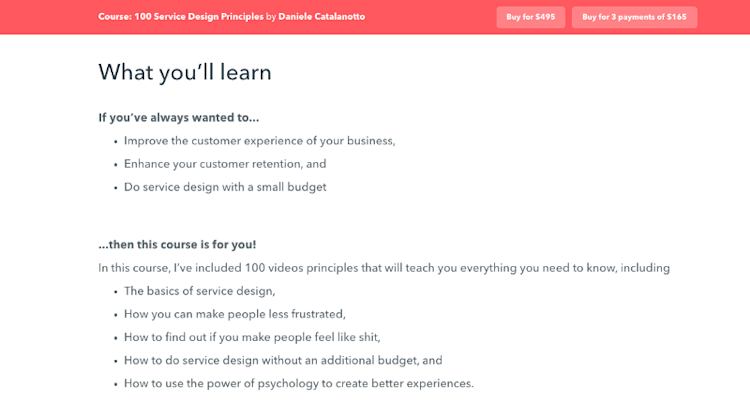
Daniele also calls out what students will learn and specifically who the course is designed for. Both are effective sales page techniques.
There’s a third element we highly recommend including on your course sales page.
You know how we mentioned earlier the impact of using videos in your lessons? This applies to your sales page, too.
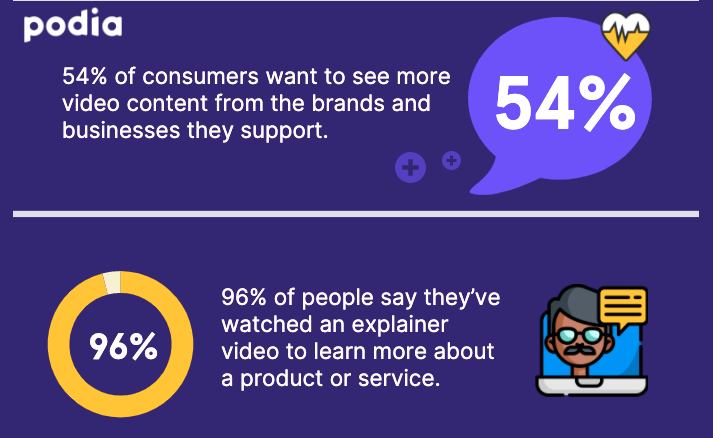
Videos are so powerful that 54% of consumers want to see more videos from brands, and another 96% watch explainer videos to learn more about products and services.
So, if you can, try to create a video version of your sales page. It gives people a great chance to know, like, and trust you.
Plus, it creates a nice clean look, like on Daniele’s 100 Service Design Principles sales page.
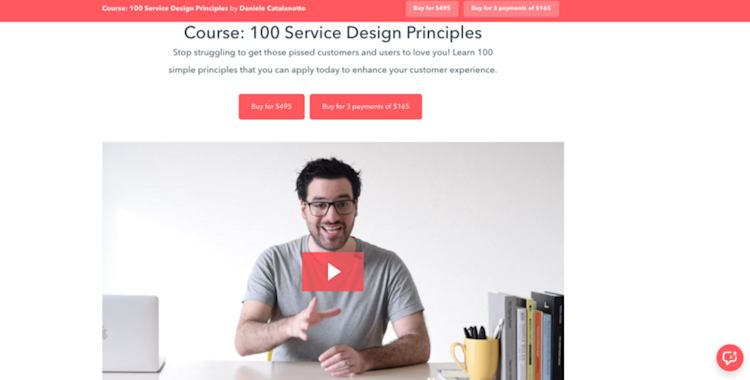
His sales page features a friendly video highlighted front-and-center of his course page.
Let’s recap:
Including social proof, clear benefits, and video content on your online course sales page will boost your enrollment.
This isn’t to say merely having these components is enough to bring people in by the droves — that’s where promotion comes in — but it’ll shorten the distance between when they land on your page and when they become a customer significantly.
Our final tip for you today also boosts your enrollment numbers. Head over to our last step of marketing.
#7. Follow a trusty marketing strategy and launch your online course
While online marketing is a hefty topic that warrants its own guide (which, we happen to have 16 online course marketing strategies for you to explore), there’s one main category that all marketing strategies have in common — email marketing.
Regardless of the marketing strategy you choose to sell online courses, email marketing is the catch-all strategy where pretty much all of your nurturing should end up.
For instance, if you use webinars to sell your digital products, it’s important to capture your registrants’ emails and continue sending nurturing messages after they attend your webinar.
This is a no-brainer, considering it’s typically a requirement to register for webinars using an email address.
Have a podcast show or YouTube channel?
You can offer your audience a free lead magnet and send them to a landing page that captures their email addresses in exchange for your resource.
Here’s how YouTube superstar Evan Carmichael features his Change Your Life in 30 Days lead magnet on an episode interviewing Marie Forleo.

When you click on Evan’s YouTube card, you end up on his landing page where you can enter your email info to download his offer.

Even if you manually reach out to influencers on social media, join conversations in Facebook Groups, or send direct messages to your LinkedIn contacts, for instance, it’s still valuable to get an email.
Why is email marketing so pervasive? Simple — it works.
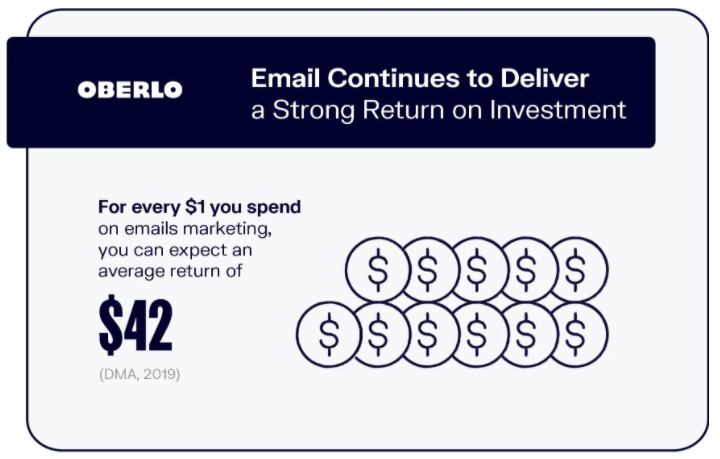
So much so that over recent years, its ROI has only gone up. Nowadays, for every dollar you spend on email marketing, $42 in ROI comes back to you.
In a nutshell:
No matter the channel, be sure to capture your audience’s email whenever possible.
That way, you can nurture your email list through the appropriate sales funnel, and eventually convert them — whether it takes a few days or a few months.
Follow our 7 trusty steps to start your online course
Is starting your online course going to take a bit of effort? Yes.
Will it be worth your blood, sweat, and tears? Absolutely.
There’s a reason why the elearning industry is expected to head upwards.
You can start your online course in seven steps:
-
Validate your online course idea among your audience first.
-
Outline iterations of your course content and share them with beta users.
-
Create your course lessons using a few streamlined formats and tools.
-
Decide on an online course platform and upload your course content.
-
Set your course pricing and take into consideration the perceived value.
-
Publish a sales page that has social proof, clear benefits, and video to enroll students.
-
Incorporate email marketing into your promotional campaigns.
Ready to get started? Great, we’re here to support you along the way.


