We’ve seen tens of thousands of product launches by Podia customers and we’ve seen a lot of data about what works and what doesn’t. There’s one key difference between people who sell a lot of courses, downloads, and coaching sessions vs those who don't: they know how to create a lead magnet people actually want.
Offering a simple, actionable, value-packed resource in exchange for an email address is a great way to grow your online audience. This is called a lead magnet, and we’ll show you how to create a lead magnet in just a minute.
But more than just growing your subscriber base, strategically setting up your lead magnet will help you to sell more products and grow your business.
In this article, we’ll cover:
-
How to avoid creating a lead magnet that no one wants
-
How to set up a lead magnet in under 10 minutes
-
How to use that lead magnet to make money online
By the end of the article, you’ll have a game plan for how to set up your lead magnet, grow your audience, and turn those subscribers into sales.
Help! No one’s downloading my lead magnet
You spend all this time and energy creating a lead magnet, only to launch it and get zero sign-ups. No one seems interested in what you’ve made, and you have no idea how all the business gurus on your IG feed are growing their lists by the thousands while you can’t manage to get one subscriber.
And on top of that, this resource that you’ve put tons of work into doesn’t bring in any money. It’s demoralizing to pour your knowledge into something that doesn’t result in any subscribers or extra income for your business.
So why does everyone talk about free lead magnets like they’re some magic bullet?
The thing people with effective lead magnets understand is that making a successful, profitable freebie has two steps:
-
You need to make a lead magnet that people actually want
-
And you need to set it up strategically so it naturally flows to your paid products so you make money
Follow these two steps and you’ll never hear crickets on launch day again.
How to avoid creating a lead magnet that no one wants
The best lead magnets make people excited to sign up. They solve a problem fast and are easy for someone to digest. To come up with an idea or topic for what to make, put yourself into the shoes of your ideal customer.
What pain points do they have? What can you solve for them in 10 minutes?
As you brainstorm and research, think about:
-
What questions do you get asked the most often? Look through your emails or DMs to see what kinds of things people reach out to you about.
-
What questions are people asking in the wild? Take a look at the questions your target audience members are asking on other blogs, reddit forms, or in YouTube comments. Pro tip: You can use the command+find feature and search for the question mark symbol (?) to find questions faster.
-
What’s the main problem your audience is trying to solve? Can you provide the first step to solving this problem or one resource that would get them going in the right direction?
-
What products or services do you want to launch in the future? Are there any smaller products you can make that would be a natural introduction to your bigger offers? For example, if you hope to offer a 12-week fiction writing course, a free workbook about fiction world-building or character development would be a logical first step.
When you have some ideas from the research above, ask your audience directly. Post a poll on social media, send an email to your existing list, or simply ask friends who could be in your target audience what appeals most to them.
Artist Kate Hursthouse tested two different lead generation ideas to see which one her audience gravitated toward.
She says, “I had two freebies both about running a creative business but focused on different areas, and one had more interest in the other, so I was able to get an idea of what people really wanted to learn about.”
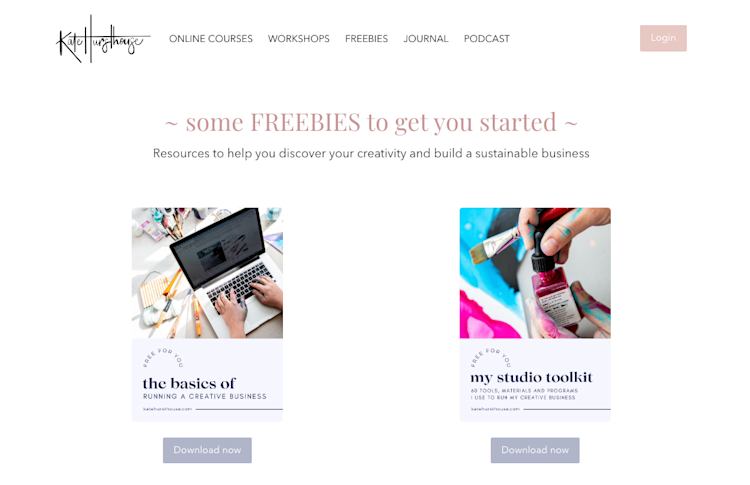
By adding both options to her website and tracking signups, she got a clear picture of what motivated people to hand over their email addresses. And moving forward, she could create more free and paid resources based on what audience members preferred.
How to set up a lead magnet in under 10 minutes
Coming up with good lead magnet ideas takes some thought, but luckily, setting it up is simple when you use an all-in-one tool like Podia.
With Podia, your lead magnet is connected to your website, products, email list, customer data, and everything else so you don’t have to wire up a bunch of tools behind the scenes.
Step 1: Add your digital download to Podia
Head to the “Products” dashboard and add a new digital download product. Upload your files, and write your title and description in the “Details” section.

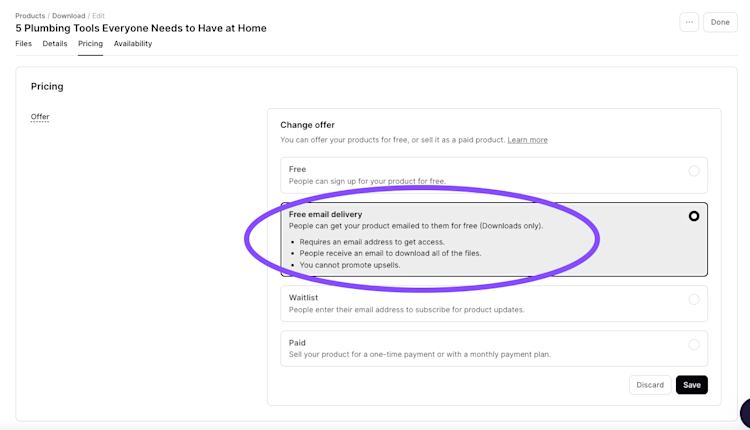
Step 2: Set it to send automatically when someone signs up
Set the pricing to “Free email delivery”. This will let people sign up for your product with just an email address, and Podia will automatically deliver the files.
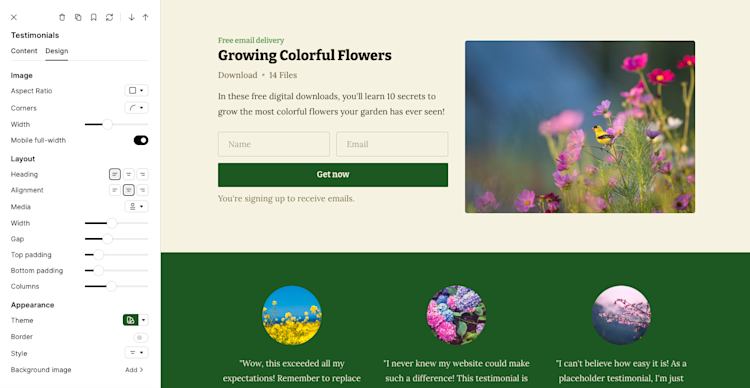
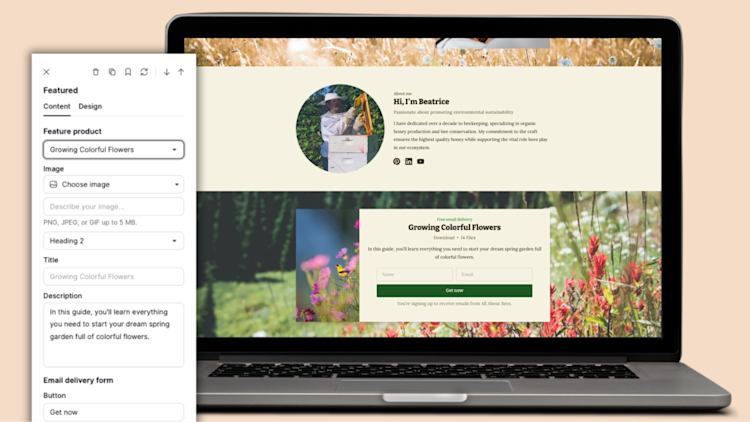
Step 3: Customize your sales page
Publish your product then head to the Podia website editor. Every product you make automatically comes with a sales page, and Podia pulls in your title, featured image, and description to save you time.
You can customize your sales page however you like with pre-made website sections like testimonials, text, videos, grids, images, FAQs, and dozens of other templates.
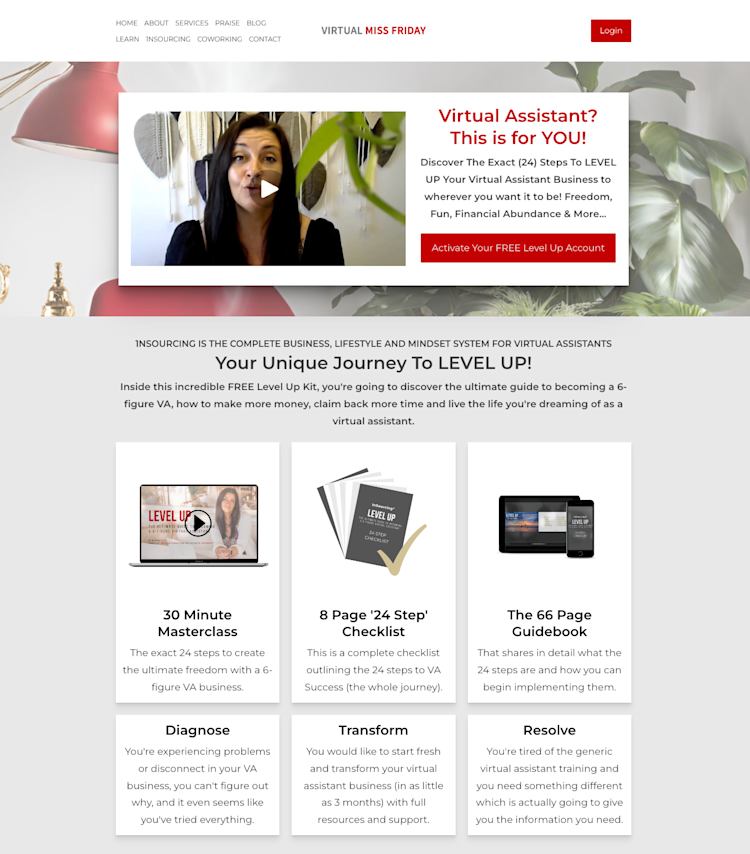
Podia Pro and entrepreneur Michelle Dale from Virtual Miss Friday uses a video section and grid section to customize her lead magnet landing page and tell prospects more about her free virtual assistant training kit.
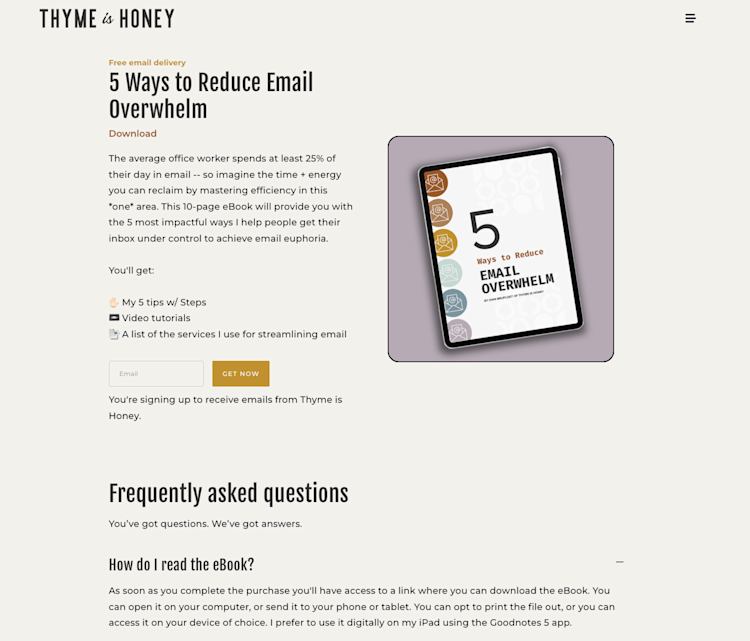
And Dani Bruflodt from Thyme is Honey has an FAQ section on her lead magnet page so people can find in-depth answers to their questions before signing up.
Step 4: Add your lead magnet other places on your website
You can add your lead magnet to other website pages, like your blog posts, social media link in bio page, home page, and any other spot that regularly gets visitors.
To do this, go to the page where you want to add your freebie in the Podia website editor, click the plus sign, and choose a “Product” section. Pick the layout you like, and then select your lead magnet product from the drop-down menu.
This will automatically pull in your product data (aren’t you glad everything is in one place?) and you can customize it to match the page.
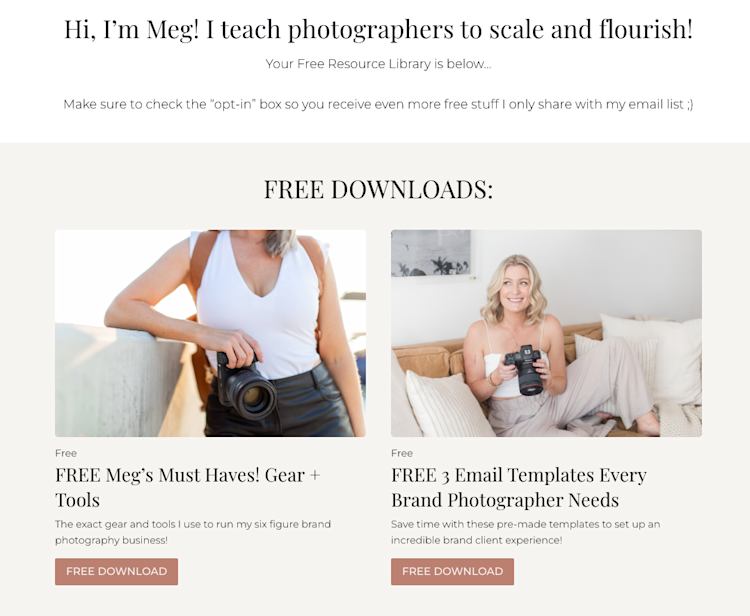
Photographer Meg Marie has two freebies linked right on her home page, just below her hero section.
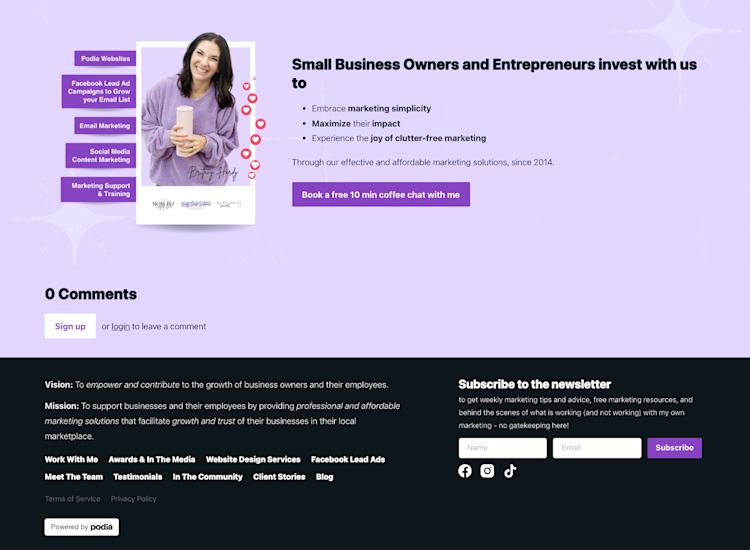
And Brittany Hardy from Empty Desk Solutions has a free coffee chat booking link at the bottom of every blog post, so potential customers and fellow business owners can stop by to learn about her services.
How to use that lead magnet to make money online
Now your lead magnet is set up to send a valuable resource to your customers and add them to your email list. It’s prominent on your website so new visitors see it, want it, and download it.
Your list is growing, and you can send out newsletters and tell your followers about your new products as they come out. Having a bigger list means more eyes on your work and more people in your circle who are interested in what you’re making, which increases the chances of making sales.
But there are a few extra things you can do to make sure your lead magnet is as profitable as possible.
Add a thank you page as a redirect after someone signs up for your lead magnet
By default, when someone signs up for your lead magnet they’ll see a success message on the screen. But you can go a step further here while your new leads are most engaged and excited about your brand.
Set up an automated thank you page and redirect new subscribers after they sign up. On this page, show a product, video, coaching session, training, or anything else you think your ideal audience member would like.
For instance, career coach Angee Linsey has a free digital download about how to find your career vision. After someone subscribers, they're redirected to a video training on the same topic so they can see Angee’s coaching skills in action.

You can even give them an exclusive discount code on this page that they can use right then to drive urgency. You’ve already got their attention, which is the hard part, so take advantage by promoting a relevant paid offer right away.
Set up an automated welcome campaign
In Podia Email, you can run an automated sequence of emails whenever someone subscribes to your lead magnet. This automation can run over several days and should include a welcome email, information about your business, more valuable content, and additional information about products you think they’ll like.
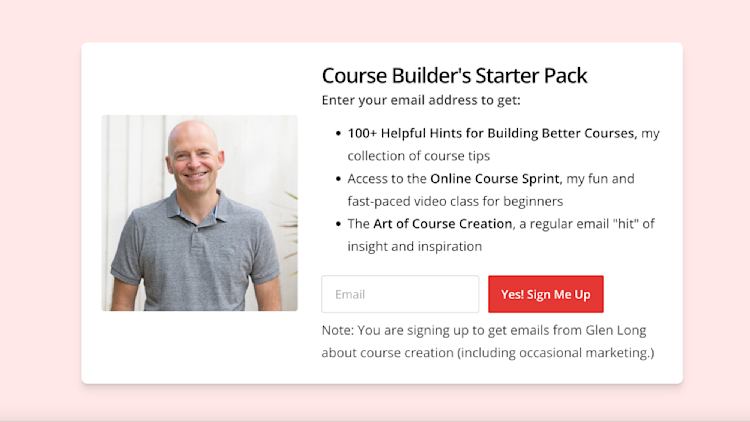
Course creator and Podia Pro Glen Long offers a Course Builder’s Starter Pack lead magnet that comes with course creation tips and a video class. He also sends out an automated email series with course ideas and advice for new subscribers.
Include your subscribers in your product creation process
Your followers have already expressed interest in what you do, so let them tell you what they want from your products. In your future email newsletters and campaigns, ask for feedback, send surveys, and listen to what they tell you.
When you have new products ready to go, you can also give your email list special discounts or bonuses to get early sign-ups. (And don’t forget to ask these early customers for testimonials too!)
Rinse and repeat for every new product you make.
Coach Carmin Wharton uses this technique to sell courses, coaching, and digital products. She says,
“Here's the key: before you start marketing, develop a customer journey that will take your ideal customer from requesting your free lead magnet/opt-in to purchasing your highest-cost product or service. For each new product or service, seek feedback to find out what the next problem your niche market needs your help with. This method ensures the retention of paying customers!”
And speaking of retaining your paying customers…
Look at your analytics to get ideas for future products and offers
You can use audience feedback and insights to build specific products, but you can also use this system to decide on the future direction you go in your business.
Everything is connected in your Podia account so you can keep track of helpful metrics like
-
which person has which product (helpful for tailoring your sales funnels and email marketing strategy in the future!)
-
which emails had the best conversion rates and earned you the most money
-
which lead magnets are the most popular
When you know what products, freebies, and email messages resonated most with your people, you can replicate them. And over time, this means increasing your bottom line, building better marketing campaigns, and growing your small business.
Growing your sales starts with a good lead magnet
Creating a good lead magnet that grows your business isn’t just throwing together a freebie and calling it a day. With a strategic approach, your free resource can mean a bigger audience and more sales today and long into the future.
-
Create a lead magnet people actually want through audience research and feedback.
-
Set up your lead magnet using an all-in-one platform, so you know everything is connected correctly.
-
Add a thank you page and automated email sequence to connect with followers after they join.
-
Ask your audience for feedback on new products, and promote paid products to your list as you release them.
You can build the perfect lead magnet for your business, complete with your email list, automations, website, and other products, with Podia. Podia is free for 30 days (and you can even start making sales on the free trial) so start your trial today to see what a lead magnet could do for your business.


